
Have you ever dreamed of having a lush, green lawn without the hassle of mowing, weeding, and constant maintenance?
Living in Melbourne, you know that the unpredictable weather can make keeping natural grass pristine a challenging task.
The solution? Durable, low-maintenance and water-free synthetic turf.
If you’re looking to upgrade your outdoor space, proper synthetic grass installation is key.
In this article, we will take you through the essential steps and considerations for installing synthetic grass, so you don’t end up having to start over or spend money fixing your mistakes.
We’ll delve into the key considerations to know before starting your synthetic grass project, provide you with step-by-step instructions to ensure a successful installation, and offer some valuable tips to maintain your new, vibrant lawn.
With the increasing interest in synthetic grass across Melbourne, it’s essential to understand the nuances of its installation to make the most out of your investment. So, let’s get started!
By the end of this article, you’ll be armed with the knowledge and confidence to install synthetic grass like a pro.
Synthetic Grass Overview
Often referred to as artificial turf or fake grass, it has gained immense popularity in Melbourne.
Here’s why:
- Low Maintenance: One of the most significant advantages is its minimal maintenance requirements. Say goodbye to the endless cycle of mowing, watering, and fertilising that natural lawns demand. Synthetic lawn remains consistently green and vibrant year-round with minimal effort.
- Water Conservation: Melbourne’s climate can be unforgiving, with periods of drought and water restrictions. Artificial grass is an eco-friendly option that doesn’t require regular watering, contributing to water conservation efforts in the region.
- Durability: It is designed to withstand heavy foot traffic, making it an ideal choice for high-traffic areas like sports fields, playgrounds, and backyard spaces where children and pets play.
- All-Season Appeal: Unlike natural grass, which can become patchy and brown during dry spells or muddy during rainy seasons, artificial lawn maintains its lush appearance throughout the year. You can enjoy a green and inviting outdoor space no matter the weather.
- Allergen-Free: For those with grass allergies, synthetic turf provides relief. It doesn’t produce pollen, reducing the risk of allergic reactions.
- Cost-Effective: While the initial installation cost may be higher than natural grass, the long-term savings on maintenance, water bills, and lawn care products make synthetic lawn a cost-effective choice in the long run.
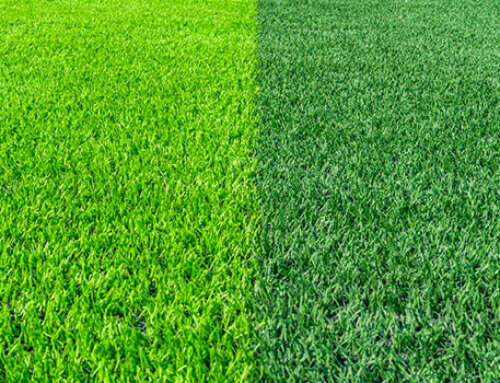
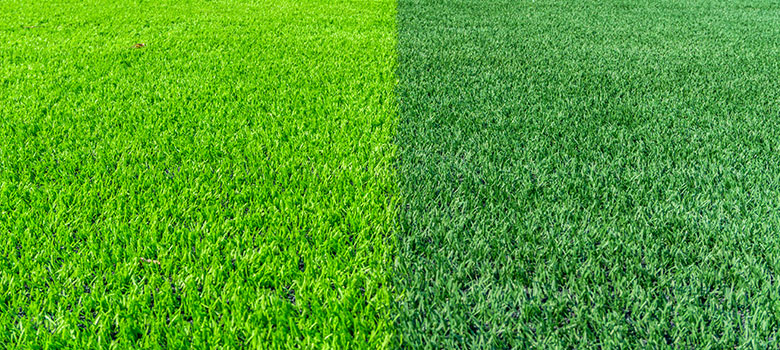
- Aesthetic Options: It comes in various shades and textures, allowing you to choose the perfect style that complements your landscape design.
LEARN MORE: Pros and Cons of Artificial Grass
Tailoring Your Synthetic Grass Installation to Your Melbourne Home
Before you start on the installation job, it’s crucial to evaluate your home or property’s specific needs and requirements.
Keep the following tips in mind.
Assessing Your Needs and Requirements:
- Landscape Type: Consider the type of landscape you have – whether it’s a small backyard, a larger front yard, or a commercial property. Your landscape’s size and purpose will influence the amount of artificial grass required and the overall design.
- Usage: Determine how you intend to use the area. Is it primarily for aesthetics, or will it be a space for recreational activities like sports or play? This will affect the choice of products and their durability.
- Sunlight and Shade: Analyse the amount of sunlight and shade the installation area receives throughout the day. Some varieties are more suitable for shady spots, while others thrive in full sun.
- Drainage: Ensure proper drainage by examining the slope and soil composition of your property. Inadequate drainage can lead to water pooling, which can affect the longevity of your artificial turf.
Tools and Resources Needed:
- Synthetic Grass Material: Select a high-quality product that aligns with your needs and preferences. It’s essential to choose a reputable supplier that offers a variety of options to suit your project.
- Tools: Gather the necessary tools for installation, which may include a shovel, wheelbarrow, rake, utility knife, tape measure, and a power broom for brushing the fibres.
- Base Material: You’ll need appropriate base materials such as crushed rock or decomposed granite to create a stable and well-draining foundation.
- Edging Material: Edging materials like timber, metal, or plastic are essential for defining the edges of your area and preventing it from spreading.
- Adhesive and Joining Tape: To secure the seams, you’ll need adhesive and joining tape designed for this purpose.
- Infill Material: Depending on the type you choose, you may need infill materials like sand or rubber granules to provide stability and resilience.
- Compactor or Roller: A compactor or roller will help ensure the even and proper settling of the base material.
- Access to Water: You’ll need a water source for rinsing and cleaning the artificial lawn during and after installation.
Installation Toolkit Checklist
Tools
- Shovel
- Wheelbarrow
- Rake
- Utility Knife
- Tape Measure
- Power Broom
- Recommendation: Look for well-known brands such as “Fiskars” for garden tools and “Stanley” for utility knives for reliability and durability.
- Tip: Check with your local hardware store or online retailers for the best deals on these essential tools.
Base Material
- Crushed Rock or Decomposed Granite
- Recommendation: Seek locally sourced base materials to reduce transportation costs and environmental impact.
- Tip: Connect with local landscaping suppliers who can provide you with suitable base materials based on your project’s size and requirements.
Edging Material
- Timber, Metal, or Plastic Edging
- Recommendation: For timber edging, opt for treated pine or hardwood for longevity. Galvanised steel is a durable choice for metal edging, and recycled plastic is eco-friendly for plastic edging.
- Tip: Visit local timber yards or hardware stores for timber edging options. Metal and plastic edging can often be found at landscaping supply stores.
Adhesive and Joining Tape
- Adhesive specifically designed for synthetic turf
- Joining tape for seamless seams
- Recommendation: Brands like “Sika” or “Bostik” offer reliable adhesives suitable for synthetic grass installation.
- Tip: Consult with suppliers or landscaping professionals for guidance on adhesive and joining tape selection.
Infill Material
- Sand or Rubber Granules (depending on the type)
- Recommendation: Opt for high-quality silica sand or recycled rubber granules to ensure proper drainage and cushioning.
- Tip: Inquire at local construction supply stores or specialty landscaping supply shops for recommended infill materials.
Compactor or Roller
- A compactor or roller for base settling
- Recommendation: Consider renting this equipment from local tool hire companies to save on costs and storage space.
- Tip: Check availability and rental rates at your nearest tool hire outlets.
Access to Water
- A nearby water source for rinsing and cleaning
- Tip: Ensure you have a hose or water supply readily available to wash down the synthetic lawn during installation and for future maintenance.
Step-by-Step Installation Guide
Step 1: Prepare the Area
- Safety Precaution: Before starting, wear appropriate safety gear, including gloves and protective eyewear.
- Clear the area of any existing grass, weeds, or debris.
- Excavate the soil to a depth that allows for the base materials, typically around 3-4 inches.
- Compact the soil thoroughly to create a firm foundation.
Step 2: Add the Base Material
- Spread a layer of crushed rock or decomposed granite evenly over the excavated area.
- Use a compactor or roller to compact the base material until it’s firm and level.
- Ensure proper slope and drainage by sloping the base away from any structures or areas where water could accumulate.
Step 3: Lay the Edging
- Install the chosen edging material around the perimeter of the area to secure the artificial grass and prevent it from spreading.
- Secure the edging in place with appropriate fasteners or stakes.
Step 4: Install Weed Barrier
- Lay a weed barrier fabric over the compacted base to prevent weed growth through the artificial turf.
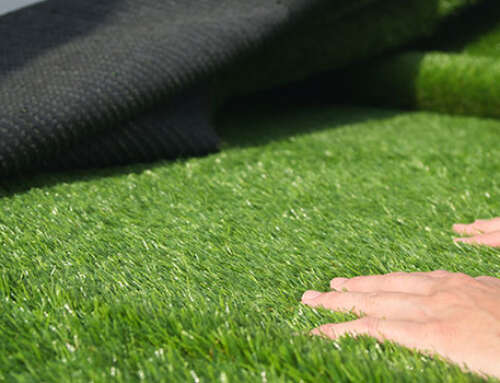
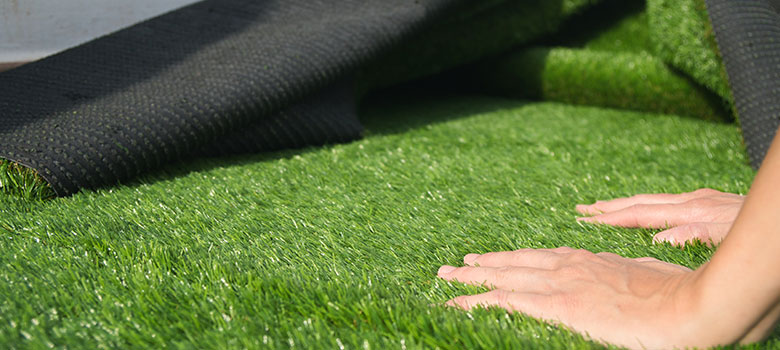
Step 5: Roll Out the Synthetic Grass
- Carefully roll out the synthetic grass over the prepared area, allowing it to acclimate to the surroundings for a few hours.
- Trim any excess grass with a utility knife, ensuring it fits snugly against the edging.
Step 6: Join Seams
- Use the recommended adhesive and joining tape to connect and secure the seams.
- Apply even pressure to ensure a seamless and secure bond.
Step 7: Add Infill Material
- If required, evenly spread the infill material (sand or rubber granules) over the artificial lawn.
- Brush the infill material into the grass fibres using a power broom to enhance stability and resilience.
Step 8: Brush and Fluff
- Use a power broom or a stiff-bristle broom to brush the fibres against the grain. This will give your lawn a more natural appearance and help the infill settle.
Step 9: Rinse and Clean
- Rinse the synthetic turf with water to remove any residual dust or debris.
- Regularly clean your synthetic lawn to prevent dirt buildup and maintain its appearance.
When to Call a Professional Installer:
- If your project involves a complex landscape design or large area, it’s advisable to consult a professional installer.
- If you encounter challenges with drainage, slopes, or uneven ground that you’re unsure how to address effectively.
- If you’re uncomfortable with any aspect of the installation process or feel that you lack the necessary skills or tools.
Transform Your Outdoor Space with Reelgrass
Ready to take the leap and transform your Melbourne property with stunning synthetic grass?
Contact Reelgrass today for personalised advice, expert guidance, and a competitive quote tailored to your specific needs and budget.
Our team of professionals is here to help you achieve the lush, green lawn you’ve always dreamed of, with the quality and service you deserve.
Don’t hesitate to reach out. Contact us now and take the first step towards a greener, more vibrant future.